Changing Floor Plan Heights In Revit
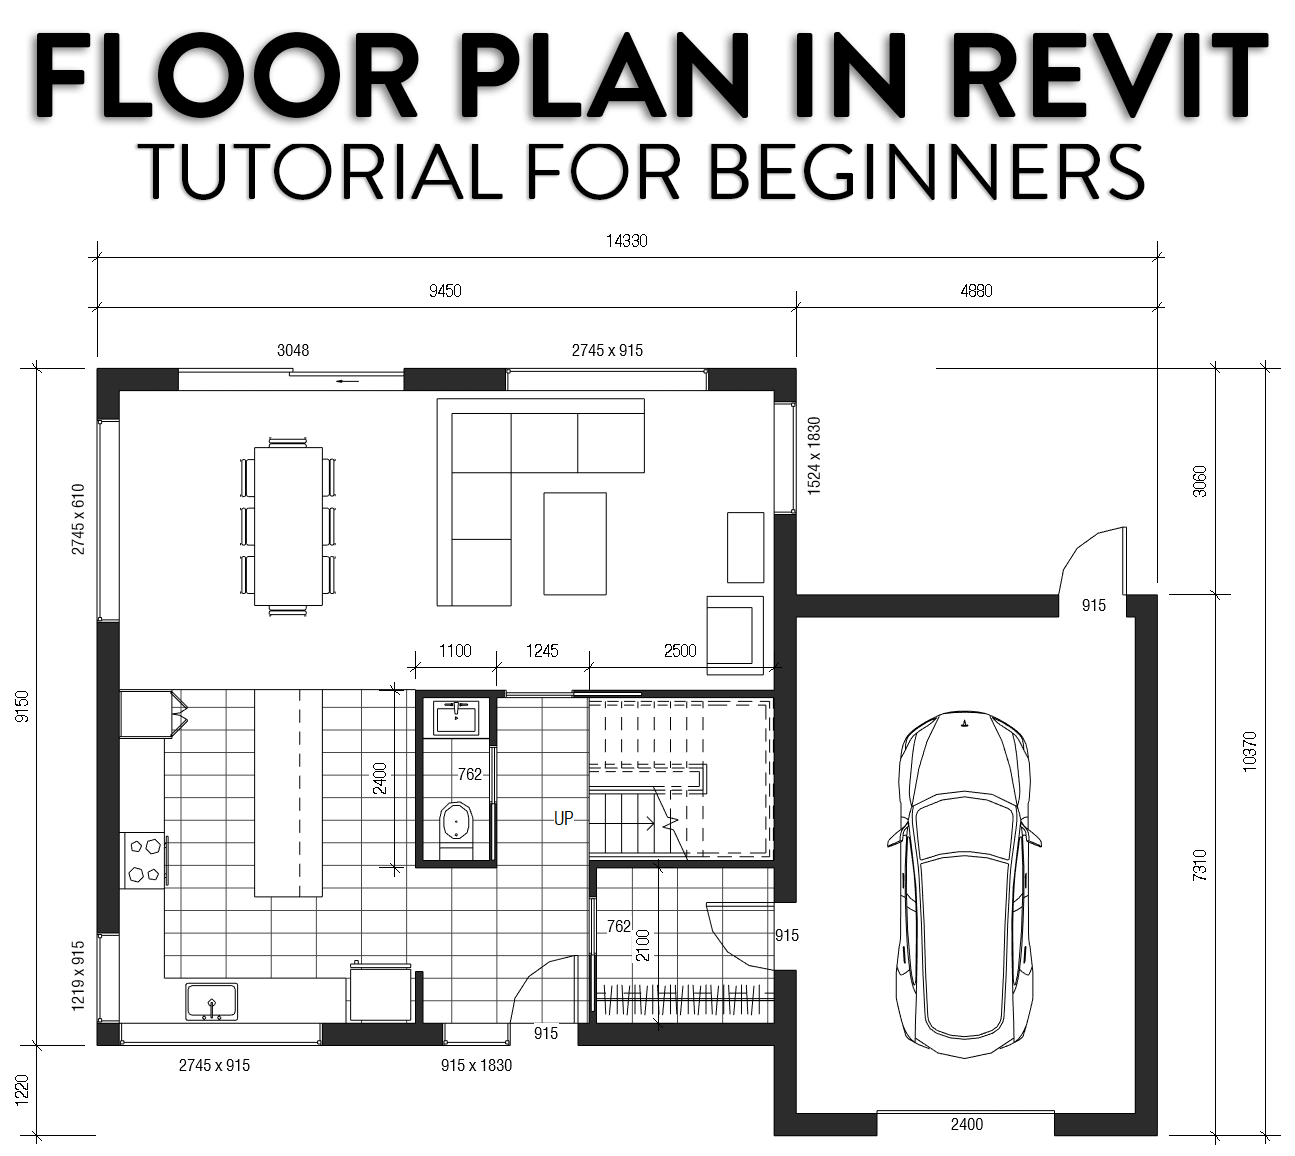
14 Beginner Tips To Create A Floor Plan In Revit Revit Pure

Solved Revit Floor Plan Showing Objects From Floor Above Autodesk Community Revit Products

How To Set The Height Of Each Floor Autodesk Community Revit Products

Beginner Revit Tutorial 2d To 3d Floor Plan Part 2 Youtube

Revit 2016 Project B 17 Adding Kitchen Casework Or Joinery Revit Architecture Joinery Projects
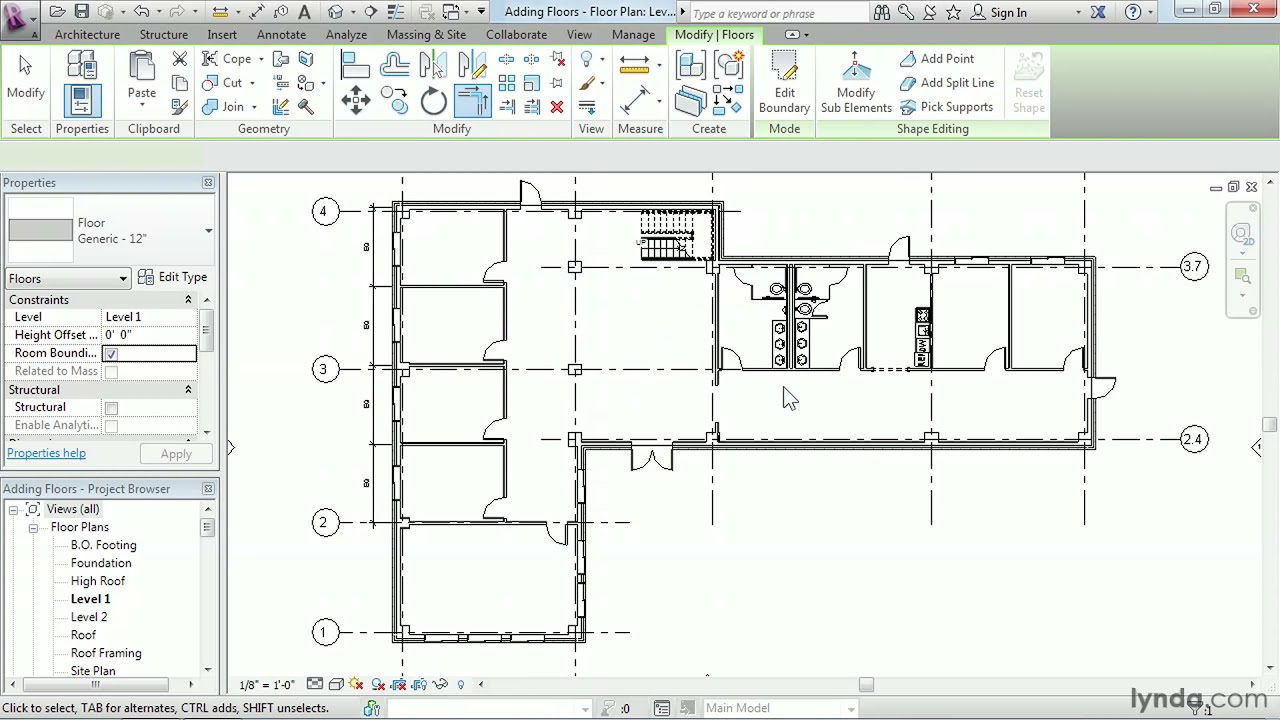
Revit Architecture How To Work With Floors Lynda Com Tutorial Youtube
Select the ground floor level and enter the known height of elevation in the dialogue box in the elevation field usually finished floor level or structural slab level or maybe a site datum all the levels will change in accordance with the new specified level.
Changing floor plan heights in revit.

Jochesxp I Will Draw Your Floor Plan Elevations Roof Plan Or Sections For 25 On Fiverr Com Floor Plans House Plans Autocad

Revit To Indesign Indesign Diagram Image
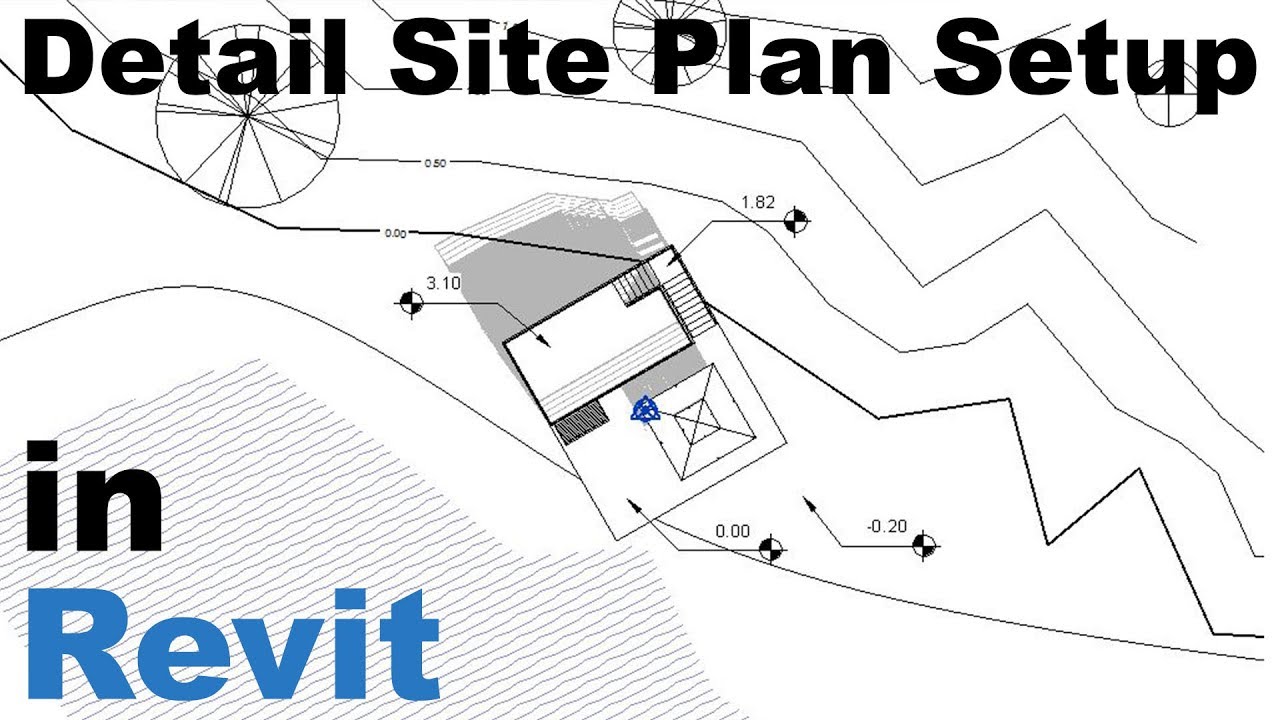
Detailed Site Plan Setup In Revit Tutorial Youtube
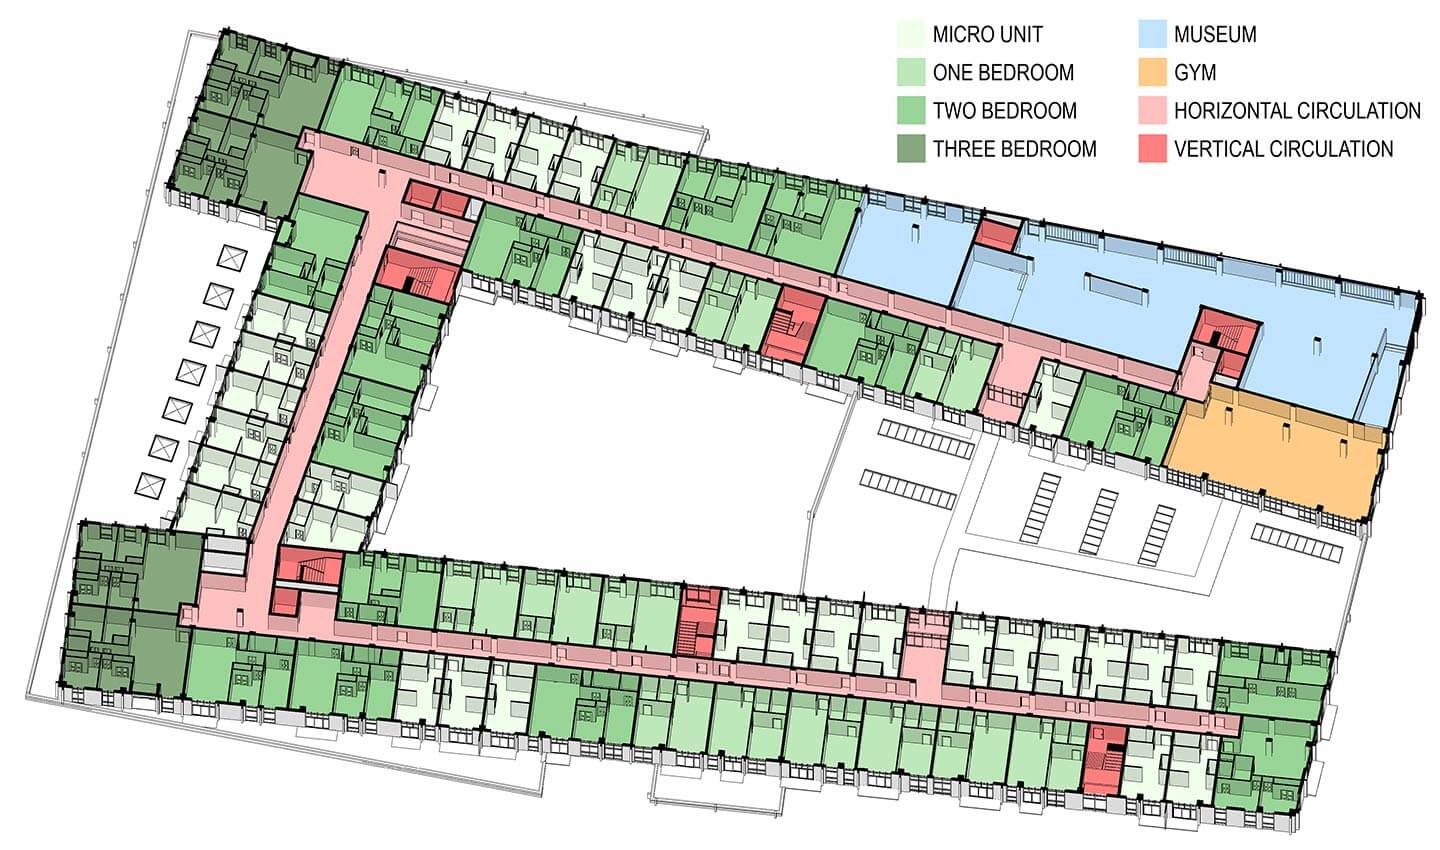
Creating Axonometric Floor Plans In Revit Dylan Brown Designs
Source : pinterest.com
